Monday, November 12, 2012

Noah's Ark

Last week we discussed the story of Noah’s Ark. We read many books about the story of Noah’s Ark, looked at various pictures of real boats, and did many experiments involving water. We also learned that the Hebrew word for ark is “teivah”.

We worked together, because we have such a small class, to create an ark out of craft sticks, glue, and brown paint to create an ark. We also used blue, aqua, and green finger paint to create the water. We included pictures of stuffed animals two by two that the children brought to school. Finally, we created a rainbow using scented paint for each color. 

Each child also made a small Ark to take home in the same way – ½ of a paper plate, brown paint, and smaller craft sticks. When this was dry they got to put as many animal stickers on the ark as they wanted. To finish this project each child used the other ½ of the paper plate and created a rainbow with crayons, paint, tissue paper, colored glue and beads, oil pastels, and watercolors.


To end our discussion, we created yummy edible Arks! Each child got ½ of a whole wheat pita, a kid-friendly plastic knife with some chocolate frosting and animal crackers. We put the items on the plate and asked the children to create an Ark!


Suggested Products from Discount School Supply®:
Large Wood Craft Sticks - 500 pieces (500T)
Colorations® Washable School Glue - 1.25 oz (SCWG)
Colorations® Simply Washable Tempera - brown (WSTBR)
Colorations® Washable Finger Paint - set of 10 (CWFPS)
Colorations® Crayons
Colorations® Tissue Paper
Colorations® Glitter Glue Classroom Pack - set of 30 (GGCLASS)
Multi-Mix Beads - 1 lb (BEAD)
Colorations® Outstanding Oil Pastels Classpack (COPACK)
Colorations® Liquid Watercolor - set of 18 (LW18)
9" White Paper Plates - 100 pieces (DIXIE)

Wednesday, October 10, 2012

In the Beginning....

This week we’ve been discussing the story of Creation. Our teaching team decided that rather than making a large classroom display, each child would make their own book about the story of Creation. To start our discussion we read many books and looked at pictures of lightness, darkness, the ocean (water), the sky, sun moon and stars, birds and fish, other animals and people from around the world and people resting. The majority of our discussion focused on the 7 days of Creation and what God made each day.

Here is one of the books our children enjoyed the most:


The first page in our book was for the first day of Creation: lightness and darkness. To make the lightness page we gave the children white oil pastels, white paint, and black paper. We encouraged the children to color the whole page and paint the whole page to represent the lightness. The children were given white paper, black crayons, and black paint and encouraged to cover the whole page to represent the darkness.

The second page in our book was for the second day of Creation: sky. We gave the children white paper, blue and white paint mixed together and white pom poms to represent clouds. We encouraged the children to paint the whole paper and place the pom poms on the paper in the shape of a cloud.


The third page in our book was for the third day of creation: separated land from water and flowers, trees, and grass. We created this page by having the children rip green construction paper (grass) and blue construction paper (water) and placing it on the paper with the green near the bottom and the blue near the top. Next we had them create a tree by cutting a trunk out of brown construction paper and adding leaves that corresponded with our current season, fall. Finally, we had the children look through magazines and cut out pictures of flowers and had them add these to this page of the book.

The fourth page in our book was for the fourth day of Creation: sun, moon, and stars. We had the children create the stars by tracing a star stencil, covering it with glue, and adding silver glitter and pieces of aluminum foil. They created a moon by coloring with white and black oil pastels to produce a gray moon. Finally, they created a sun by painting a pre-drawn sun with yellow paint and covering the paint with yellow and orange glitter.


The fifth page in our book was for the fifth day of creation: birds and fish. We created this page by doing some research about birds commonly found in our area (Illinois) and the families printed pictures of these birds at home with their children and then cut them out and glued them onto a piece of white paper. For the fish page we used the fish rubbing plates with crayons that did not have wrappers on them.

The sixth page in our book was for the sixth day of Creation: animals and people. To create the people page we all drew self portraits by looking into a standing mirror, using crayons, and white paper. To create the animal’s page we used animal print paper and animal stencils.


Our seventh page in our book was for the seventh day of Creation: rest. We took pictures of our children sleeping. We also colored pictures of items that we commonly use during Shabbat (Kiddush cup, challah, and candlestick holders) because we rest during Shabbat.

We finished the book by using a binding machine and putting all the pages together. We covered the ends of each page with contact paper so they were reinforced and wouldn’t come apart as easily.

Suggested Products from Discount School Supply®:
Colorations® Outstanding Oil Pastels Classpack (COPACK)
Colorations® Simply Washable Tempera - white (WSTWH)
Colorations® Simply Washable Tempera - black (WSTBK)
Colorations® Simply Washable Tempera - blue (WSTBL)
Colorations® Simply Washable Tempera - yellow (WSTYE)
Colorations® 9x12" Heavyweight Construction Paper (9ALL)
Bag of Pom Poms (POUNDPOM)
Familiar Shapes Stencils (ESTEN)
Colorations® Extra Safe Plastic Glitter (GLSET)
Colorations® Washable School Glue (SCWG)
Junior Rubbing Plates (JUNIOR)
Colorations® Chubby Crayons (CRCHB)
Amazing Animal Paper (AAPR)

Monday, September 17, 2012

Introducing the Jewish Holiday of Rosh Hashanah:

This week we started our discussion of the Jewish holiday called Rosh Hashanah. Because the children in my class are just turning 3-years-old, I have to lay the foundation to introduce them to this holiday. Rosh Hashanah is the celebration of the Jewish New Year and the World’s birthday. We celebrate this holiday by hearing the Shofar, a hollowed out ram’s horn, blown every morning. We gather as an entire school to share this ritual. We wish our friends and family a sweet new year by saying, "L’Shana Tova." We also eat sweet things during this time like apples dipped in honey. We spend the majority of our time discussing apples in depth throughout the week. Apples and honey symbolize a sweet new year during the holiday of Rosh Hashanah.

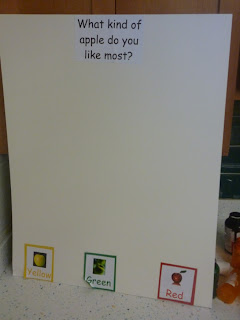
The first activity we did is an apple taste test. Each child was given one piece each of red delicious, golden delicious, and granny smith apple to try. The children were then asked to decide which apple they liked the best. We gave them small pieces of white paper, encouraging them to write their names on the paper with markers and put them on a chart above the apple they like the best. This activity encourages children to begin to attempt to write their names, count, and begin to become familiar with graphing. Once everyone had voted, we counted as a group to see how many of each apple they liked and which they like best.


Next, we looked at various types of fruits that grow on trees that the children are familiar with. We read the story, A Star in My Orange written by Dana Meachen and discuss the different shapes we might find in the foods we eat. Before we cut the fruits in half, we had the children guess what shape we will find inside each fruit. We cut a red and green apple in half and found a star. We cut a banana in half and found a triangle. We might cut a yellow and green pear in half and find another star. From reading the story, they also knew that we could cut an orange in half and find a star!

Green Apple
Banana
Yellow Pear
                                                                                        
Lastly, we made stained glass apples using Con-Tact® paper, Colorations® red, yellow and green tissue paper and construction paper. The children each cut an apple shape with a hollow center from the construction paper. We then placed the apple cutout onto the Contact® paper. We encouraged the children to put as many pieces of tissue paper onto the apple cutout as they want. However, they quickly learned that if they put on too many they will fall off. Eventually they figured out that putting one piece on at a time will work best. This activity helps the children make a connection with the apples, fruit and shapes we have been studying while allowing them to express their creativity.

Monday, June 11, 2012

Saying Goodbye!

The Lord bless you and keep you; the Lord make his face to shine upon you and be gracious to you; the Lord lift up his countenance upon you and give you peace.
Numbers 6:24-26

We have finished out our year and are starting our summer camp program. I want to go back and let you know what we did through the month of May to help each of us think about the last 5 months that we have been together. This was a happy and sad month for all of us. I am always so happy to see how my children have grown throughout the year physically, socially and academically. Each one has worked very hard and achieved so much. Each will go on to a new class with a new teacher and continue on their journey of growth.

The sad part is, like every year, I have grown also in my attachment to each and every one of these precious young children and will miss them very much. Some will stay at the school and I will still see them every day and some are moving on to other schools and soon we will lose touch as has happens every year.

Throughout the year I take a lot of pictures and I allow the children to take pictures also. So we decided to make scrapbooks that the children could look back on and recall friends, special days and great times. Each child picked out 15 pictures that they would like to use to make a 5-page scrapbook. We each had a 1” three-ring binder, sheet protectors and scrapbook paper. Each day they were allowed to create a three-photo page by cutting their pictures, gluing and adding stickers. These were their pages and had no input from me. On the cover was a picture of the whole class. I have to say these turned out very cute and will be a keepsake.


To keep our scrapbook in we used White Canvas Backpacks (BACKPACK)  and BioColor® Paint (BIO16) with BioColor® Fabric Medium (BIOFAB). Each child chose a color and put their handprint on all 12 backpacks. We wrote their names next to each handprint and put the school, class and year on each. The binder slipped very nicely inside the backpack and each child was excited to take them home to share with their families.

I will miss this class, like I miss each class. A new class will be starting in the fall and I will grow to love, encourage and hopefully motivate each one to look forward to their continued growth.

Our Bible verse through-out the school year is. “I can do all things through Christ who gives me strength” - Philippians 4:13

Have a blessed summer.
Lynn

Friday, May 4, 2012

"Forsake Not Your Mother's Teachings"

I Peter 4:8 - Above all, love each other deeply, because love covers a multitude of sins.

This has been a very busy month for us. Our school year is coming to a close and Mother’s Day is just around the corner. We will be working on craft for our moms and our end of the year project. These are happy and sad occasions. We love to celebrate Mother’s Day, but I am sad to see my kids move on to another class or school.

I asked the children what they would like to do for mom on Mother’s Day. They gave me wonderful ideas, but one struck me as really cool sounding. Julia, who loves art a lot, wanted to do something with all the pictures that we have been taking throughout the year.

We decided to go on a nature walk and pick up leaves, flower petals from the garden and anything else flat that they wanted. We put these items in the flower press for a few days and talked about how we wanted to display them.

In our classroom we have four great windows and I try to put see-through items in them. The children are used to doing a lot of activities for our windows.

We took all the nature items that we collected, pressed them on the sticky side of laminating film along with five of their favorite pictures. This was about 8 ½” wide and about 12” long. Once they were happy with their activity we added a thin border of scrapbook paper around the edge. We ran it through the Xyron® No-Heat Laminator (NOHEAT). This laminator allows the children to laminate their own art without fear of burns. We punched holes in the top and strung red ribbon through the holes for hanging.

These keepsakes made a great Mother’s Day gift, that was completely done by the children.


It will be exciting to see the expression on mom’s face when she opens her gift. We had so much fun making these and hope you do too.

Wednesday, February 29, 2012

Rainbow Promises

“I have placed my rainbow in the clouds. It is the sign of my covenant with you and all the earth. Genesis 9:13”

This is one of my favorite times of the year. Spring is just around the corner and we can experience the wonderful weather where we can head outside. We are going to explore the wind and the rain, planting seeds and making wind chimes.

Our first week in March was all about the wind and spring rains that we get in Arizona. We have cool temperatures through March, April and May, before the desert heat sets in.

In circle time we talk about how God planned for seasons. This is the life cycle for all living things and spring is that renewal of life that has been hibernating during the winter. In our classroom we have wonderful window that we look out each day to see what the weather is like. We looked at clouds and tried to guess what they looked like. We read the story, “It Looks Like Spilt Milk” and made our own blotter art with White paint and dark color construction paper and laughed at what we thought they were.    

With spring weather, it changes very fast. It can be raining, than the wind blows all the clouds away and behold a beautiful rainbow. The children wanted to make rainbows like they saw out our windows. We read the book “The Rain Came Down” by David Shannon . We talked about how the rainbow is a promise from God that he would never flood the earth and that a rainbow is always seen after each rain when the sun comes out. We sang the rainbow song so the children would learn the color order of the rainbow and the shape we learned was an arc. We set out to create our see-through rainbows.

We each had an 8 1/2 x 11 piece of wax paper. I set out BioColor® paints in the rainbow colors. I use BioColor® because it is the only paint that will adhere to wax paper, not flake off and the colors are translucent. I gave them the freedom to use their fingers and paint to make their rainbows. After they were dry we put construction paper frames of their color choice around the wax paper and hung them in the windows. They looked awesome and were a lot of fun to do.

This is just the beginning of so many spring activities that we all enjoy so much.

God bless and have a wonderful March.
Lynn

Monday, February 6, 2012

Oh, the Wonderful Things of Valentine’s Day!

“We Are Wonderfully Made”

I so love Valentine’s Day that I make it the two weeks of Valentines. I love the wonderful colors of pinks, reds, purples, and all the lace, doilies and ribbons.

I also love to cook in the classroom during these two weeks. We love to make pancakes in heart shapes and waffles with red strawberries and yogurt.

This is a great time to use so many books and activity extensions. One of my all-time favorites is Jamberry, by Bruce Degan. I use this book to help my children understand that God has given us our five senses to experience all the, wonders of everything In this book.

For the sense of sight, I put all kinds of glitter, sparkle, and construction paper in the art and writing center for them to use to make cards and hearts.

For the sense of touch, we used silk scarves for dancing. We filled the sensory table with lace, doilies and material along with scissors for cutting. They used these items also in the art center. This was also a great small motor skill builder.

For the sense of taste, we made, Jamberry Tarts. We took refrigerator biscuits, rolled them in to small balls and put a thumb print in them and a spoonful of jam. We went to the school kitchen and watched them bake.

For the sense of hearing we make sound sensory bottles with all the colors of pinks, reds and purples.

For the sense of smell, we made Valentine heart potpourri that we could give away. We used the large doilies from Discount School Supply®. If you double them it makes them pretty sturdy and can be sewn easily with yarn and stuffed with whatever scent that the children would like to put in them.


We made red, pink and purple play dough with koolade and of course used a lot of heart, cupids and Valentine shaped cookie cutters.

Valentines is a great time to talk about love for one another and that God loved us so much, “We are Wonderfully Made”.

Have a blessed week.

Lynn